http://www.murphywebsite.com/home/home/ Tank Water Filter
Ok, let's get started. Below are the items
you'll need to purchase. The pictures showing close ups of
item follow later. You'll also need some Plumber's Tape not shown in the
picture just below, but you'll
see it in a later step. The only tools needed are two pliers. You'll
have to hold one fitting with one of
the pliers and turn the fitting you're wanting to connect to the first fitting
with the second set of pliers.
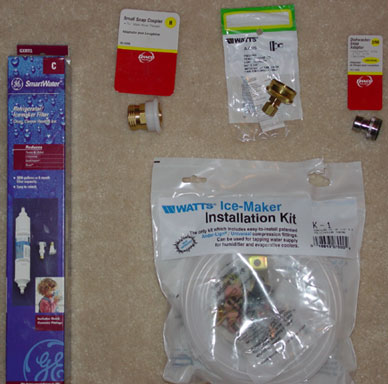
Items Needed:
Ice-Maker Installation Kit with 25 feet of 3/8 inch hose
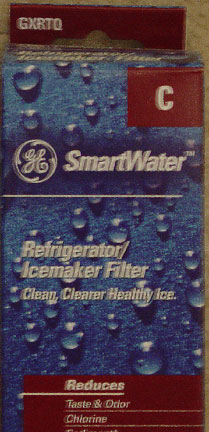
Refrigerator/Ice-Maker filter with 3/8" male coupling ends
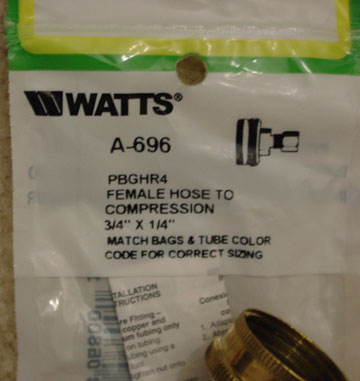
Female Hose to Compression 3/4" X 1/4"
Small Snap Coupler 3/4" Male Hose Threaded
Dishwasher Snap Adapter - Dual Thread 55/56" - 27 THD
10 or more feet of aquarium hose
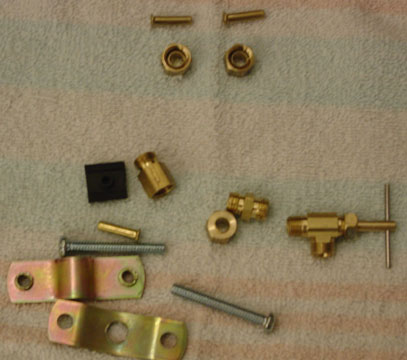
Cool, you got all your parts and now back at your place dieing to get this thing
together. Lay out
all your parts you just bought on a table or the floor, give yourself some room
to work with. After
taking out the parts put the bag the part came out of under the part or just
above it to help
identify each part and make the project less confusing.
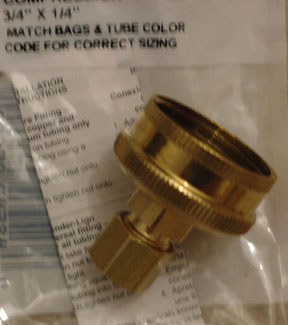
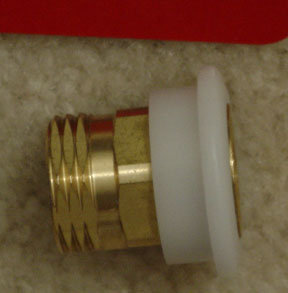
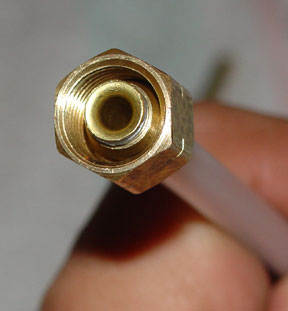
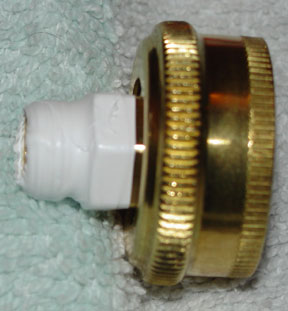
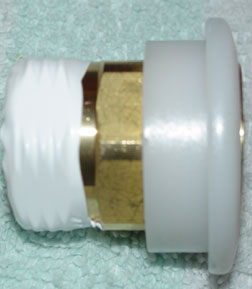
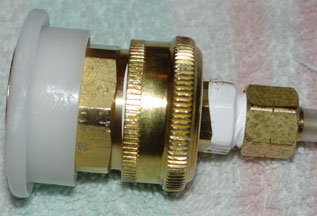
Below we have two pictures of the Female Hose to
Compression (FHC) Coupler. Remove the 3/8" fitting
you see in the picture below and to the right. The fitting is that thing
that screws onto the main piece.
|
|
|
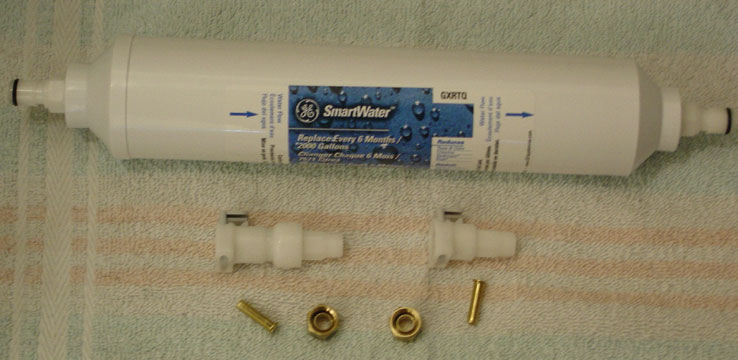
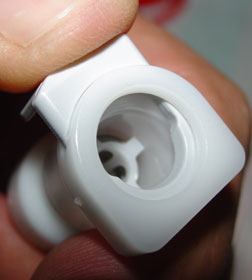
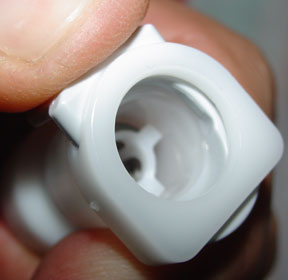
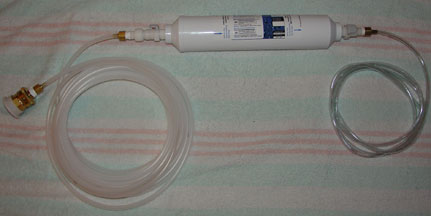
Below we have pictures of the Refrigerator/Ice-Maker filter
|
......................................
|
|
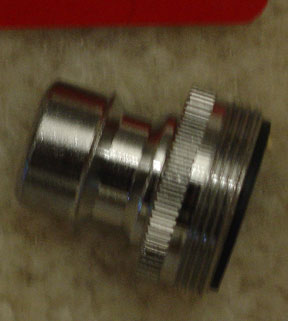
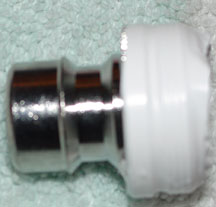
Below we have pictures of the Small Snap Coupler
 |
 |
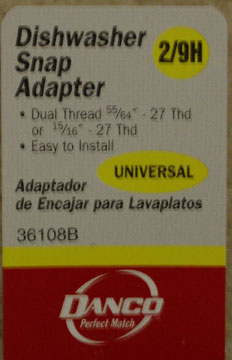
Below we have pictures of the Dishwasher Snap Adapter
 |
 |
Below we have pictures of the Ice Maker Kit. Notice
in the picture to then right that some of the pieces
have been separated and moved to the top. The two compression fittings
with the brass stems above them.
These are the only pieces we'll use other than the 25 feet of tubing from the
kit.
 |
 |
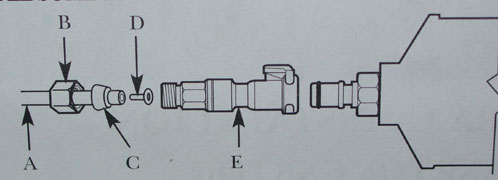
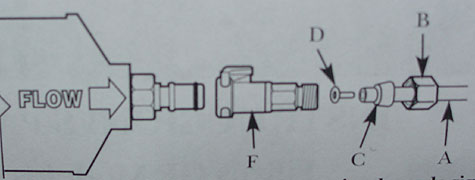
Below the diagram shows how to connect each plastic coupling that came with
the Refrigerator/Ice-Maker filter.
Notice that the couplings ( E and F ) are different lengths, E is longer.
The end of the filter that the "E" coupling
goes to is the end that will connect to the sink. Coupling "F"
of course going to the http://www.murphywebsite.com/home/home/ tank.
 |
 |
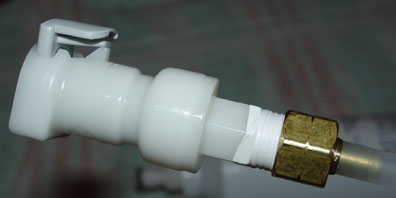
Below I've taken one of the 3/8" compression fittings
and put it partly together for you to see the order. It's
pretty simple, Put the hose through the compression fitting, then place the
compression sleeve down over
the hose, Then cap it off by pushing the brass stem into the hose.

Once you have the above accomplished, compress everything
together to get a nice tight fit like below.
Repeat these steps for both ends of the 25 foot hose that came with the ice
maker kit. And do the same
for one end of the aquarium hose.
Below is a picture with the Plumber's Tape I said I'd show
at the beginning of this page. Notice that the
"E" and "F" couplings from the diagram above have been
"taped". On all your Couplings and adapters
with male ends you need to tape them. Male ends being the ends with the
threads. When taping, don't
wrap too much tape around threads. Doing so will make the final
connections harder or impossible.
I wrap the Plumber's tape twice around the threads of the coupler or
adapter.

Below you'll see that I Taped the male end of the FHC coupler. Remember at
the beginning
when I told you to remove the 3/8" fitting?
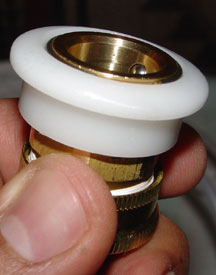
Ok, wanted to show you how the couplings for the water filter attach to the connectors
on the filter.
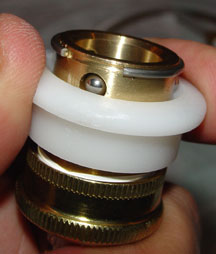
Below and left you see the coupling with my thumb on the depressor tab, not
pressing on it. Below
and to the right I've applied pressure to the tab forcing it to press down and
open the coupling. This
I've found out isn't the easiest thing to do, those tabs tend to not want to
move for you. But sooner or
later you do get them depressed and they connect.
 |
 |
Once you're done playing with the depressor tabs, time to
connect the fittings. Screw the coupling into
the fitting until you can not hand tighten it any more. Then use your
pliers to grab either side of the
fitting/coupler connection and turn another half turn. This should give
you a good tight fit.
Remember you have two different water filter
couplings. Coupling "E" (the longer of the two) needs
to be connected to the fitting you compressed to the 25 feet of hose which will
go to the sink.
Coupling "F" gets connected to the fitting with the aquarium hose,
this end will go to your http://www.murphywebsite.com/home/home/ tank.
Now let's work with the end that will attach to the
sink. Below you see that the FHC coupling has been
connected to the other end of the 25 foot hose 3/8" fitting.

The Small Snap Coupler needs to be taped if you haven't done so yet.
And using your pliers screw the
Small Snap Coupler into the FHC coupler. Make them nice and tight.
 |
 |
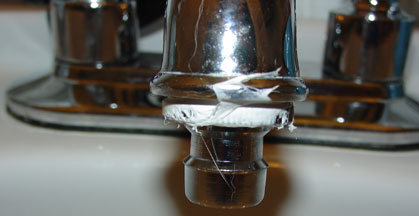
Ah, almost forgot about that Dishwasher Adapter. Tape
it if you haven't already. And then go to the sink
you are planning to get your water from for your tank. My sink in the
kitchen has a water filter for our
drinking purposes. So I went with the down stairs sink. The
Dishwasher Adapter fits standard size
sink faucets. So if you find that you can not put the adapter on, guess
what, you don't have a standard
sink faucet, poor you. Go back to the hardware store and get the right
one. Once you do have the
right adapter, go to your sink of choice. Some sinks have a piece that
screws off the faucet right at
the end the water comes out. It usually has a small mesh screen in
it. Unscrew it and replace it with
your new adapter. Should look like something below and to the right.
Don't like that tape look, get
a scrubbing sponge and just scrub the tape that is visible away.
 |
 |
Almost done! The Small Snap Coupler has a sleeve that moves up and
down. This sleeve needs to be pulled
down in order to attach it to the Dishwasher Adapter on your sink.
Basically making it a quick connect. You
don't have to screw anything onto anything. Holding the Small Snap Coupler
like in the picture below and left,
use your thumb and index finger to grasp the plastic sleeve and pull down.
As shown in the picture below and
to the right. Then push that puppy up onto the dishwasher adapter on your
sink faucet and let go. You should
have a nice water tight connection.
 |
 |
Oh my God, is that a brand new water filter????? It sure looks like one. Yea You!!
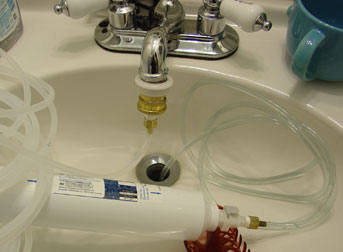
One last step......the water filter has to be flushed the
very first time you use it. It has carbon deposits that
are loose and you'll see them going through your hoses. This flushing is a
one time thing, after running water
through your new water filter for 5 or 10 minutes you will not need to do it
again until you buy a replacement
filter. The picture below shows my filter connected to my sink, and the aquarium
hose going into the drain.
Water was actually running through it when I took the picture. The first
30 seconds or so you'll see black
gook coming out of your filter. That's normal the first time you use your
filter. It's that loose carbon I told
you about. Hope this project was fun for you and now you hopefully have a
new and better way of getting
clean water to your http://www.murphywebsite.com/home/home/ tank. Enjoy!
| Questions? Comments? | ||
|
|
||
| Email Me |
Click Here to go back to main http://www.murphywebsite.com/home/home/ page