|
|
|
Setting up your Med Tank
You can buy all your med tank parts separate,
but why? Get yourself a kit. It makes it easier and Cost effective.
You want a five or ten gallon tank kit. Small is key here, you want a
place for your sick fish that will be easier to treat.
I choose the ten gallon myself because in my 55 gallon tank, I've got a lot of
fish, and if one of them is sick by disease,
then most likely I've got others sick too. So I personally need something
that can house four or five fish comfortably.
And for those of you that have never given meds to fish, the label tells you to
give a cap full for every ten gallons of
water. So a ten gallon tank makes it easier for those of us that don't
want to have to pour back and forth meds into
the bottle to get half a cap full just right. Tank kits come with
everything you need to setup a new tank. They don't
come with extras like, gravel, fake plants, and décor. I personally would recommend
these last items as the key factor
to most fish diseases is stress. And imagine if you were taken from your
home when you were sick and stuck in a room
much smaller with NOTHING in it. Most fish are hiders, they need
some place to duck under or behind to feel safe.
Click on any of the pictures to get a larger picture.
|
|
|
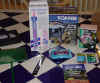
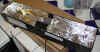
So here we go, you
buy yourself a aquarium kit, yea you! The picture above and to the left is all
the goodies laid out
for you to see. You get the filter, heater, thermometer strip, and some
packets of starter food and water conditioner.
Above and to the right is the tank itself. Remember, you get just the
minimum needed. My fish deserver more than just
the bare minimum, so in the "goodie picture" you see all the way
to the right the air pump and just below is the tank hood
with light that I also purchased. The gravel, fake plants, and décor I
either bought or have left over from my other tanks.
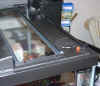
Just below you see the tank hood on our
sink, my girl friend (Love you Hon) got sucked into this hobby just as
much
as I did. See the piece bent up to the left? That piece is precut
and with a kitchen knife I easily cut it out. The filter,
heater and air hose will go through the new opening.
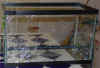
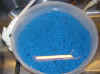
The picture below shows the gravel I had
left over from another tank I put together. Make sure you wash the gravel
as it will have dust and what not in it. Click on the picture and you'll
see that the water is murky, The gravel was never
used, but needed to be washed. Some so called fish experts will tell you
not to get gravel. Saying it is only pleasing to
the eye and can be harmful to your fish. Bugger off! fish experts! Ever
seen a tank with no gravel? If and when you
do, the first thing you say to yourself is eewwww! All you see on the
bottom is fish poop. Gravel makes the tank more
pleasing to the eye, and come on, you got the fish to look at. Shouldn't
your tank be as pretty as you can make it?
AS well as give more area to allow the good bacteria your fish need to grow and
cling too, all those extra surfaces
on each piece of gravel will be home to that good bacteria you need.
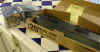
The picture below shows the tank after a
good washing with the hood on it and the filter and heater in place.
The heater is that thing to the left with the red knob sticking out from the top
of the hood. Seemed like a good
place to put it until I realized that once I put the water in the tank the
heater would be submerged and this heater
can not be completely under water. So I moved it right next to the filter,
worked out good.
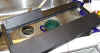
Below is a front view of the tank with
its hood on. Notice there is plenty of room in the opening cut out for the
filter and
heater to share.
![]()
The light with the hood has two
bulbs. Looking at it I thought it would give more light out put if I
placed some kind of
reflector inside the hood. I grabbed the foil and went to town. And
if you don't have the prettiest out come, no worries
mate, it'll be upside down and out of sight any way!
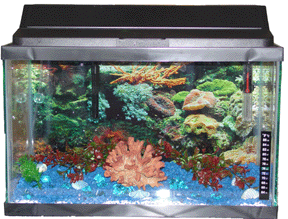
Below is my med tank completed. I
had left over backing so used it. The fish could probably careless about
the tank
backing, but I think it looks nice and my vote out weighs theirs ;-)
The fake planets stand up when water is
in the tank, below water had not been introduced into the tank as of yet.
The heater you'll notice is still on the right side of the tank. After
taking this picture I realized it wouldn't work that
way. The piece of décor that looks like coral has an air stone under it
so the bubbles spread and go around it, making
for a cool effect. As well as aerating the water. The thermometer
strip is inside towards the bottom right. You
simply peel and stick it on. The hood light just sits onto of the hood,
all easily done. Once the tank is filled with water
you add the water conditioner. Add only one or two fish at the most.
As the tank NEEDS to cycle properly.
Click Here to Go to Main Fish Page Click Here to go to Home Page